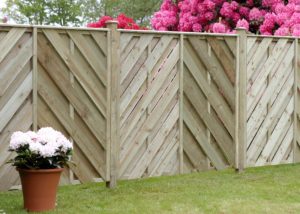
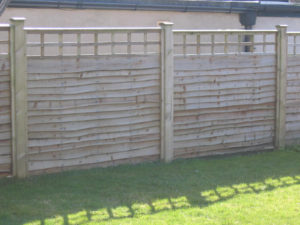
So you want to erect a panel fence, let’s have a look at the tools and materials you’ll need and where to start!
Materials
- 2 x Stakes
- 1 x ball of String
- Length of the fence line / length of the panel – Fence Panels Posts
- Number of fence panels + 1 – Fence Posts
- Same as the number of fence panels – Gravel boards
- 1 x tin of Wood Preserver
- Nails
- 6 per panel – Galvanised Screws or Brackets Posts Caps
- 1 per post – post caps
Tools
- Hammer
- Paint Brush
- Spade
- Sledge Hammer
- Spirit Level
- Claw Hammer
- Screw Driver
- Tape Measure
There are a number of questions to initially consider when deciding on building a fence:
How long will it be?
Identifying the length of your fence is relatively easy! Hammer a wooden stake into the ground at the starting point and another at the end of your fence line; tie string to the first stake and stretch it out in a straight line to the finishing stake. This will give you a straight line to follow when you are building the fence and also a physical line to measure when you are calculating the amount of materials needed.
NB: Always ensure there are no electrical cables or pipes running in the ground beneath the fence area – services are usually in a straight line but this cannot be trusted so always check.
How long will it take to put up?
As one of the easier and more cost effective types of boundaries (a stone wall can be costly, a hedge can take up to five years to establish) a fence can also be erected in most cases within a single weekend.
Will I need any help?
There are number of simple steps to follow to build a fence but a second pair of hands would probably be advisable to make the process easier.
HOW TO …
Posts
At Duncombe Sawmill we recommend using as thick a post as possible, especially if they are being erected on a windy site.
As a rule of thumb – 3” x 3” or 4” x 3” posts are suitable for 3 to 4ft high panels and 4” x 4” posts for 5 to 6ft panels.
Posts need to be sunk at least 2ft into the ground (though if manageable 2ft6”). The base of the panel should sit 2” off the ground and the post should be at least 2” taller than the panel to make room for the post cap.
NB: Even if the fence post has been pressure treated it is advisable to give added protection against rot to the portion of the post sitting in the ground.
Dig
It is easier to erect one panel at a time, so dig out the first two post holes, to 3⁄4 of their depth, along the fence line depicted by the string. NB: The space between the holes will be the length of the fence panel.
Knock in the first post using a spirit level to make sure it is square and upright.
Gravel Boards
It’s a good idea to use gravel boards to keep the bottom of the panels from touching the ground and soaking up the moisture and therefore prolonging the life of the panels. Attach the correctly sized gravel boards to the bottom of the fence posts with brackets or nail in place.NB: ensure, when the fence is over a hard surface, that there is a 5mm gap between the board and the ground to allow water to run under the boards rather than soak into them.
Panel
Attach the panel to the post with galvanised nails, weatherproof screws or brackets and use a line on the run to keep straight. Prop up at the correct height, knock in the second post to the correct depth and attach the panel again using the spirit level to ensure it is level. Secure the posts in the holes by ramming broken brick or stone hardcore in to the base of the post holes to support the posts and then refill the first two holes. We would suggest that you only concrete your posts in when the ground is unstable (stony or sandy).
Repeat
Until all your panels are in place.
Cosmetics
Trim the tops of your posts to ensure they are all the same height, apply ensele to protect them and screw a post cap to each of the posts to protect them from the weather.
For more information about planning permission and fence heights, boundaries and ownership please read our information sheet fence height and boundaries.


